Showing posts with label Classic. Show all posts

Tuesday, May 29, 2012

Grandma's Plantation Puffs


Normally at the beginning of my blog I give credit to whatever website I pulled the weeks recipe from. This week we are very fortunate to be using my Grandmother's own recipe for Plantation Puffs, which I will be providing all of you to enjoy.

I have something insanely special to share with all of you today. This recipe is actually my grandmother's recipe for Plantation Puffs. These little frittery doughnutty gems are fantastic for anyone of any age. They are fast, they are economical, and best of all they taste far more complicated than what they actually are. This can be used for an appetizer at a party, as a desert, or as a special breakfast item on the weekends (which is what my family used them for mostly). Regardless of the time of day or event these will be a show stopper for all who try them.

For this recipe you will need:

For the Puffs
2 cups AP flour
1 tbsp. sugar
2 rounded tsp. baking powder
milk
1tsp. salt
1 tbsp. melted butter
1 large egg

For the Coating
1/2 cup sugar
1 tbsp. ground cinnamon

Before we get in to the nuts and bolts of this recipe I'd like to address frying. I do not have a lot of experience in frying, as you will find out later on. It produces fantastic results when done right, and it actually quite quick compared to other forms of cooking. Frying is also inherently dangerous due to the fact you are essentially cooking in napalm, and will feel like it if you get splashed. I urge everyone to please be careful when frying anything.

Basically you can fry two ways. If you are fortunate enough to have an actual "Fryer" it is much easier and less messy. The Fryer will actually maintain your heat for you, and you usually can just cap off the fryer when done and leave the oil in. Personally I do not own a Fryer so I use my cast iron dutch oven to do the job, which is quite common. The cast iron will help maintain heat for you, and is durable enough to withstand long exposure to high temperature without damaging the pot. Using your dutch oven will require a fry or candy thermometer, and a metal spoon or a "spider" to fish out your product (pictured below). There are also many oil options you can use. The recipe called for shortening (Crisco), which I did not use (I didn't have enough). I usually use Peanut Oil when I fry, mostly because of the flavor it provides.


Similar to baking the first step to frying is starting to heat up your oil. For this recipe I found it's best to keep your oil in the 360-380 range. Make sure you monitor your oil temp regularly to ensure you don't under cook, or over cook your puffs.

While your oil is heating up go ahead and get out a mixing bowl and put your sifter in the center of it. Put the flour, sugar, salt, and baking powder in your sifter and sift until it's all in the bowl (yes... I know normally sugar is technically a "wet" item but for this recipe it's not necessary). At this time put your egg in, and about a half cup of milk to start.

*This is where my grandmother starts to make this a lookin' thing. You have to realize she didn't measure many things while cooking, a lot of it was purely by eye. You have to add your milk a little bit at a time until you get the right consistency. The right consistency should be a sticky dough that appears kind of furry, almost like a tuna salad. After you have the right consistency, add your butter and stir it in.


Another item to complete before frying is getting your coating ready. This is extremely  simple, just put your 1/2 cup sugar and 1 tbsp. of ground cinnamon in to a bowl, and mix well.


Now as long as your oil is at the right temp, we are ready to fry. I set up an assembly line to make things a little more organized for my self (pictured below). First the bowl of batter, next the oil, next the cinnamon mix, and finally a plate (with a paper towel on it) to put the final product.


Using two kitchen table spoons dish out a ball about 1 maybe 2 inches (max) across in to the oil. Fry for about 4 minutes, until you have the right color and ensure it's cooked thoroughly. Trust me on the 4 minute minimum, I actually screwed up the entire first batch I made by not frying long enough. They were raw in the middle. Also the smaller the puff, the less fry time it requires. Trust ya boy on this. This weeks video shows an example of this assembly line, and I will admit I did not fry the puff in this long enough.


After the puff is fried put it in the cinnamon bowl and roll it around. If you need to, spoon the coating over the puff to ensure full coverage and put on the finishing plate.


I will warn all of you, these suckers are addictive. The end product is a cross between a fritter and a doughnut, and you can't eat just one! I have to admit this was actually a very satisfying recipe to cook. I have many memories of my grandmother cooking, and in many ways she is one of the biggest inspirations I have had in the kitchen. This is a recipe that will always be in right in the front of my folder, and I hope you all enjoy these as much as I have. Eat well everyone!

*Note: I wanted to present my grandmother's Plantation Puffs per recipe, and they are fantastic without any fiddling around. I will admit in the future I'll be trying a batch with cinnamon in the batter (maybe some nutmeg too), just to see how it would taste. Just an idea ;)

Friday, April 6, 2012

I Love Bread Pudding


Make sure you go to Idiotdadcooks' Facebook Page and "Like" it! Hints, tips, updates, product reviews, and more will be shared through Facebook! There is a link in the right column! See you there! 

The original recipe for Bread Pudding can be found on a web page called MomsWhoThink.com at http://www.momswhothink.com/easy-recipes/bread-pudding-recipe.html (Which is funny because I'm a Dad and the blog is Idiotdadcooks)

Simply put, I love Bread Pudding. It's a dessert that fits almost any occasion and any entree`. It can be dressed up or dressed down, simple or complex. Really I can't think of a setting that bread pudding would be an inappropriate dessert to serve. In the pantheon of sweets, bread pudding is most definitely in my top 3.

You'll love this recipe because truly it's a budget friendly dessert that packs a sophisticated wallop when it's finished. When I was considering what to make this week I was trying to think of a dessert that would mostly incorporate what I already had in the pantry (again, no budget) and used many ingredients we have used together on this blog. It turned out I already had every ingredient required save two, the french bread and half N half. Six bucks and a trip to the grocery store later I was ready to rock.

I have to say I've had some pretty rave reviews about this bread pudding so far. I myself and a conniseur of sorts concerning bread pudding, and I must admit (even though I made it myself) this is among the best I've had.

For this recipe you'll need:

For the Bread Pudding
2 cups Half N Half (hnh)
1/4 cup butter
2/3 cup brown sugar "packed" (light or dark depends on your tongue)
3 large eggs (size Large eggs are standard size for baking)
2 teaspoons cinnamon
1/4 teaspoon ground nutmeg
1 teaspoon vanilla extract
3 cups of bread (french bread is what I used) torn up in to little pieces
1/2 cup raisins

For the Sauce
1 cup Half N Half
2 tablespoons butter
1/3 cup granulated (regular) sugar
1 teaspoon vanilla extract
1 tablespoon flour
dash of salt

Set your oven to 350 before you do anything else. You want to make sure it's good and ready for this so the pudding will cook properly.

A lot of bread pudding recipe's will require you to let your bread go stale. This makes sense because the invention of bread pudding was a means to figure out how to utilize stale bread. This recipe thankfully does not require that step, and can be made in a pinch.

Start off by taking a 1.5 quart casserole dish and lube it well with butter. Simply cut a stick in half and rub the interior of the dish well until you've evenly coated the inside. After you've done that tear apart your bread until you have 3 cups worth. You're going to want the pieces to be relatively small, though size variation is expected. Place the torn up bread pieces evenly in the dish, and set it aside. Now we need to concentrate on making the custard for our pudding.


To make the custard you're going to want a non stick sauce pan (my preference), and a whisk or large spoon. Poor your half N half in to the sauce pan, and set your heat to medium. Let the half N half come up to a boil, and add your butter, stirring relatively constantly until the butter is melted. Take the half N half/butter combo off the burner and set aside.

*A Side Note: Dairy on heat tends to be somewhat volatile. It will bubble up quick and over flow if not attended. Don't ignore dairy on heat. Thank you.

Next you're going to combine in a "mixer safe" bowl the eggs, cinnamon, nutmeg, vanilla, and brown sugar. Take your hand mixer and mix for about one minute. Make sure you start slowly with a few pulses, you don't want to wear the mixture.

This is where you have to wait for your hnh/butter combo to cool down to a lukewarm state. Realize the eggs will turn in to scrambled eggs if your not careful, so make sure you can completely comfortably touch the hnf/butter mixture before you add it to the bowl.

Once you can comfortably touch your hnh/butter mixture start your hand mixer again. While mixing start to drizzle the hnh/butter mixture to the bowl. Keep doing this until both mixes are completely combined. Once this is done simply pour this mixture over the bread. Add your raisins to the top, and with a large spoon gently mix the bread, custard, and raisins. Make sure all the bread has absorbed a good amount of the custard mixture, and put it in the oven (please make sure your rack is dead center of your oven). Bake for 50 minutes, and prepare to fend off small children, animals, and spouses. The smell will take over the house, and you will love it.

The video this week is a tad long, but will show you the general assembly of the custard and the combining of it with the bread.


While your bread pudding is cooking, go ahead an wash the sauce pan you used for the hnh/butter mix because you'll need it for the icing like glaze we will be making next.

I would hold off on starting this glaze until about 10 minutes before you are due to take the pudding out of the oven. This stuff is fantastic but will set up quickly, and you'll want the liquid factor to be in full play when you pour it over your pudding. Actually, you may even want to wait to start the glaze after you take the pudding out, it depends on how well you multitask.

This glaze is actually pretty easy to make, but does ABSOLUTELY  REQUIRE YOUR ATTENTION THROUGH THE ENTIRE PROCESS! Simply put all the ingredients listed above in the the sauce pan, turn your heat on to medium. (*Note: for those concerned with a loose term like "dash of salt" just shake a normal salt shaker about two times over your glaze, that will suffice) With a whisk simply stir, and keep stirring the entire time it's on the heat. When it starts to boil regardless of your stirring set a timer for 4 minutes. Continue to stir until the timer goes off. Turn off your heat at this point, and let the glaze rest for about 2 minutes. After the rest time, simply take the entire sauce pan over to your bread pudding and evenly distribute the glaze over the entire dish.

*Note: Below there is a picture of a spoon coated in the glaze with a wipe mark on it. To test your glaze to see if it's the right thickness you can dip a spoon's backside (yes a clean one) in to the glaze, and take your finger and wipe a strip off. The glaze should basically stay still, as seen below.


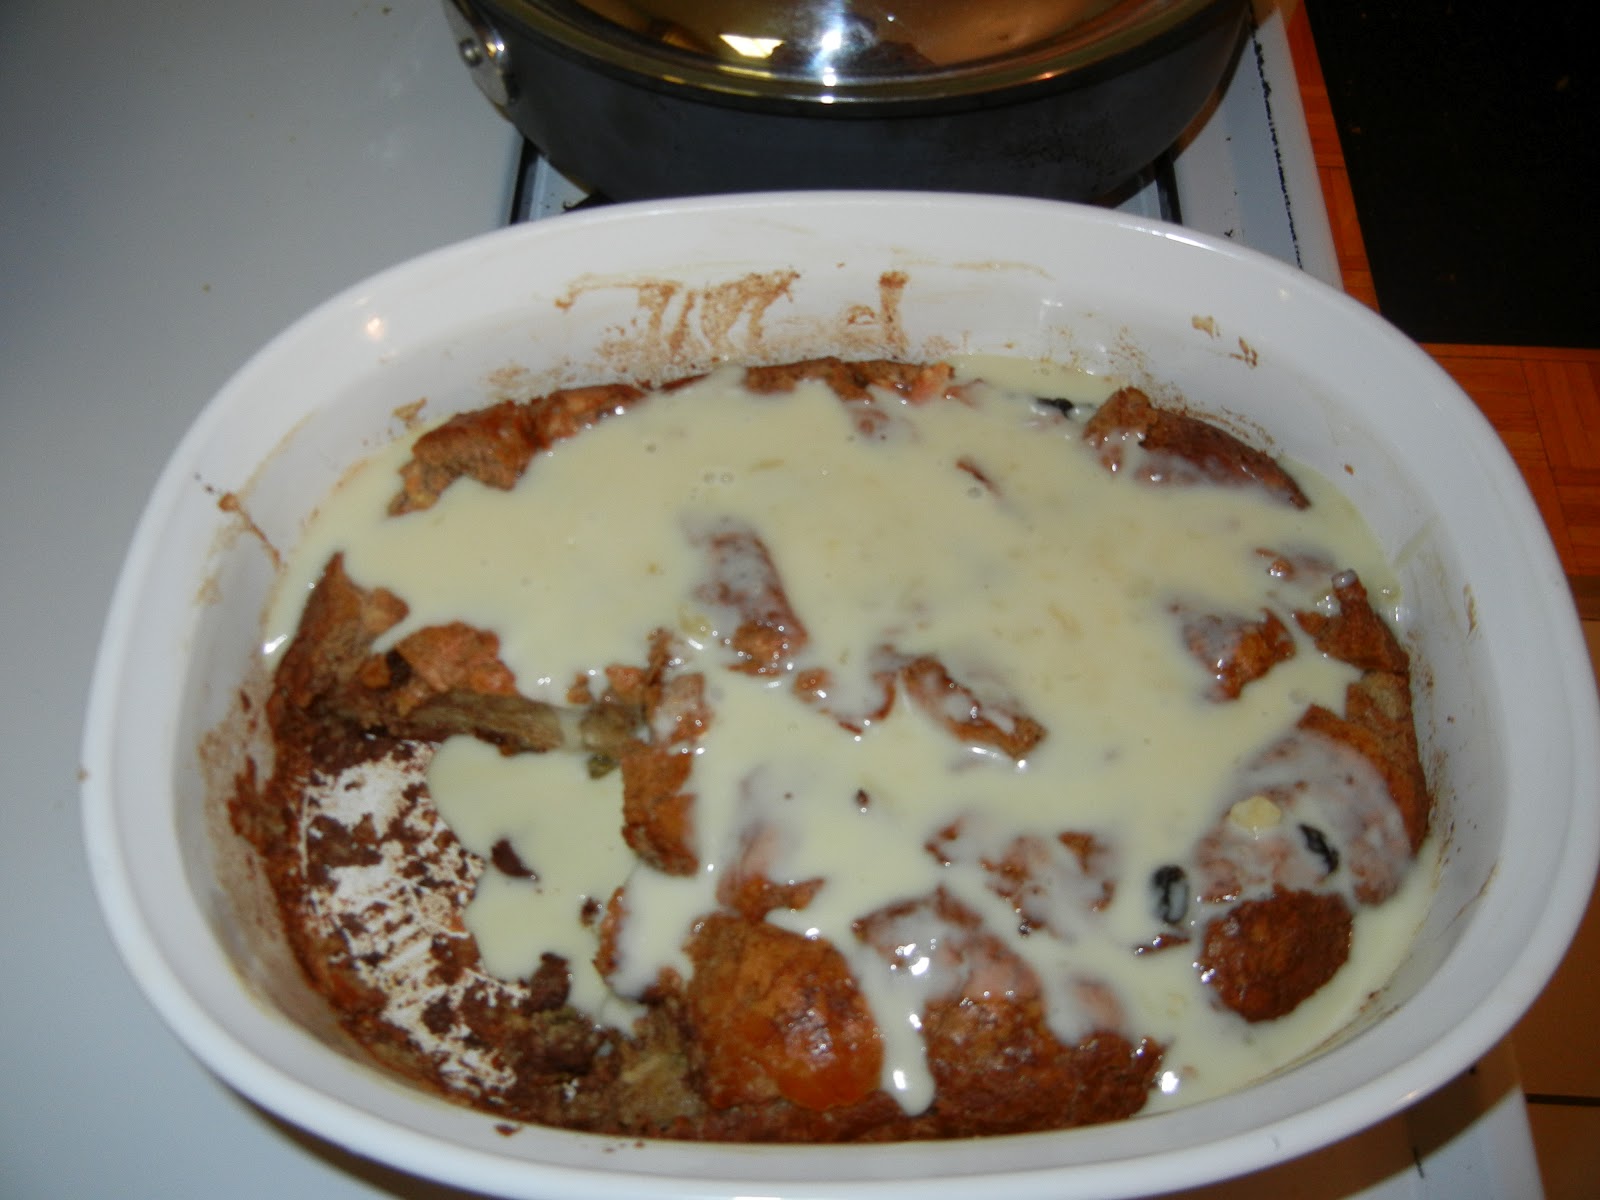
Below you'll see a few pictures of the finished product, in the casserole dish and plated.


This bread pudding is AMAZING. Not too sweet, certainly far from bland, not soupy, yet certainly a bread pudding. This is a wonderful, cheap, simple, yet sophisticated tasting dish. You'll love it, as will anyone you allow to touch this (and yes, you'll be tempted not to share). This certainly is a favorite of mine, and my family as well. Eat well everyone!

P.S.
This is fantastic reheated. Cut off the offending portion you wish to consume, put it on a small plate and microwave on high for 1 minute. The glaze will remelt, and the pudding will now lose much moisture at all.

Sunday, March 18, 2012

Carroty is the Cake


The original recipe for Carrot Cake that I used can be found at Food Network's page at http://www.foodnetwork.com/recipes/paula-deen/grandma-hiers-carrot-cake-recipe/index.html Courtesy of one of my food heroes Paula Deen.

I'm absolutely sure I will lose some Foodie points for saying this, I am not a big cake fan. I said it, Mark is not a fan of cake. Generally it's from a box (which is understandable, Mark is not hatin'), the frosting is too sweet with almost no flavor, and it has a texture like your chewing on nothing. It wasn't until about a decade ago when I started experimenting with home made frostings and batters that I started to appreciate what cake can be. BUT even before that, Mark did have a cake weakness that persists to this day, one of my absolute favorite desserts ever, and vice, Carrot Cake.

"Mark why carrot cake?" Well for starters, carrot cake is actually not a cake. It's a muffin (which admittedly is another food weakness of mine). That's right you read it correctly, the batter is actually a muffin batter. Thus not only does this cake have flavor it has body and texture as well. The icing most people associate with carrot cake, cream cheese icing, is also extremely flavorful and extremely quick to whip up fresh any time you want it.

I'd like to talk equipment before we get in to the down and dirty. The official recipe calls for 3, 9" cake pans. I used two. You'll find my cake turned out well in the end, if not a little uneven. Either way you go will be fine. I personally use Aluminum cake pans, not the dark coated. I've met people on both sides of the argument "dark v. aluminum". I will say this, I've been baking my own cakes since I was 14. I have never burned a cake in aluminum, and have burned almost every one in dark pans. Use what you prefer. Also we will be using a "hand mixer", and a "mixer safe" glass bowl. Also as you will see I used an icing spatula, and cake turn table (optional). Also I used a 4 sided grater.

For this recipe you will need:

BATTER:
2 level cups AP flour
2 level cups sugar
2 teaspoons baking soda
2 teaspoons ground cinnamon
1 teaspoon salt
4 large eggs
1 1/2 veg oil
3 cups grated carrots
1 1/2 cups chopped pecans (yum!)
(Mark Addition to this recipe)
1/2 cup raisins
1/2 cup golden raisins

ICING
2 (8 ounce) packages cream cheese
1 stick SALTED butter
16 ounces powdered sugar
1 teaspoon vanilla extract
1/2 cup chopped pecans

OK so first things first. Get the 2 packages of cream cheese and stick of salted butter out of the fridge and set them on the counter or table to get up to room temp while your working. Also set your oven to 350 degrees (universal baking temp).

One of the cool things about this recipe is that you can really just throw everything in to the bowl, mix, dump in to the pans, and bake. There isn't much of an order you have to follow, which is rare in the dessert world. BUT I always like to get everything prepped before I start combining things in to the bowl. So we will start with the prep.

Start with the pecans, because they're a pain if you have to chop them. I bought whole so I could show you how to chop them of course. Get out your cut bored and set the prescribed amount of pecans on the cut board. Your going to simply pile them up as well as you can, put your (if your right handed) left hand over the tip of the knife, and use your right hand to go up and down through the pile. DO NOT ACTUALLY "CHOP", you don't want pecans flying all over your counter top. Simply run the knife through the pile cutting as nicely as you can, when the pile gets messy scoop it up in to a nice pile again, and repeat until it's to the consistency you require.


Set those aside, and while your in the pecan mood do it again for the pecans you'll need for your icing later. Once that's finished, wipe off your cut board, and prepare to GRATE!

The process of grating is actually quite simple. Wash your carrots in cold water, then use a peeler to peel them prior to grating. Set up your grater on your cut board, and use the medium grate side. Keep doing this until you have the required amount of grated carrots. Yes this will take some time, yes your arm will be tired.


Once the carrots have been grated and your pecans chopped you can go ahead and throw all the ingredients in to the bowl for the batter. Flour, sugar, carrots, pecans, oil, baking soda, cinnamon, salt, eggs, raisins, etc. all go in the bowl.

Just an aside on the next step. The recipe calls for a hand mixer at this stage, which I used. I regret it. I own a KitchenAid stand mixer, as well as my hand mixer. Certainly there are times I actually prefer my hand mixer over the KitchenAid and vice versa. This batter is well defined as sludge. It is thick, it is hearty, and may actually kill your hand mixer if you aren't careful. If you have a stand mixer, use the paddle attachment, and follow the below directions. Otherwise, be careful as I had to be.

When all the items are combined start to mix the concoction on the lowest setting possible at first. I say this because you have a lot of flour and sugar in there, and if you put the spurs to it too quickly you'll be wearing your batter not eating it. If your mixer starts to sound like its struggling, don't be afraid to give it rest, grab a spoon, and hand mix for a second to give it a head start. Eventually the batter will loosen up and start to come together. Increase speed as it does. The last picture in the series below is how you want it to look when you're done.


The original recipe calls for butter to lube up your pans with before you bake, so it will come out easily when it's done. Call me lazy, but use Bake Easy. It's a canned baking lube that actually has flour in it, and it turns out perfectly every time.


Simply spray your pans, and put the batter in. Done. Too easy? Maybe, but I'll take it. After you've distributed the batter between your pans you'll want to lift one about a foot off the counter, and drop it. Yes drop it. Make sure it doesn't flip or anything, make sure it lands flat. This will remove most air bubbles and make your cake have the proper texture. Repeat for each other pan you filled. Once this is done, put your cakes in your oven on the middle rack side by side.


You'll bake these for 40 minutes total. Do me a favor though, set your timer for 20 minutes. When it goes off, switch your pans around. That will help reduce the effects on any hot spots you may have in your oven.

While your cakes are baking take this time to make your icing.

BEST. ICING. EVAR.

Use again a mixer safe bowl. Put the cream cheese, butter, powdered sugar, and vanilla extract in to the bowl. Again set your mixer to the lowest level possible and slowly combine. Once everything is mixed up a little and not "powdery" give it some juice and start to stir while the mixer beats. Pretty soon you'll have a smooth creamy icing fit for any cake you could possibly want to whip up. There is also a movie tip below for those of you with little or no experience in this matter.


Once you've mixed your initial icing, dump the remaining pecans you chopped earlier in to the bowl. Use a regular spatula to mix them in well. This really will put your carrot cake over the top once you've completed it.


Once your cakes are done baking you need to take them out of the oven and put them on cooling racks immediately until they are completely cooled.


Finally we are on the last step. Icing the cake. I have a turn table for this, but it is not necessary. Then again, it does make things nice and they are only about $20.

Put on cake down on your cake board or whatever you intend to keep this on. Put a relatively thin layer of icing on the top only. Then put the second layer on top.


After that put a large dollop of icing on the top of the cake. Smooth the icing around the top of the cake until it looks to be about the right thickness. Put another dollop on top of the cake, and work it down the sides. Continue until the cake is completely covered.


After you've covered the cake evenly take a wet paper towel and wipe out any excess icing that may be on your board. This will help it look a little more professional and less like a hack job.

Below is the finished product both uncut, and cut.


Simply put, this carrot cake is awesome. I hate to say it that way especially since I made it. But it's true. Thick, flavorful, this carrot cake is everything you could ask for in a dessert. It simply tastes far more complicated than what it really is.

"But Mark it's not piped and all beautiful!" True it's not. It's rustic, and home made. Piped and beautiful only goes so far, it has to taste great too. I tend to prefer ugly cake (no offense to those with wicked piping skills, you're awesome) over most "pretty" cakes you'll find. But that's me. Try this, you'll love it. Eat well everyone!