Showing posts with label Southern. Show all posts

Sunday, June 3, 2012

Chicken & Dumpling Classic


The original recipe for Chicken and Dumplings can be found on FoodNetwork.com at http://www.foodnetwork.com/recipes/paula-deen/chicken-and-dumplings-recipe/index.html courtesy of one of my food heroes Paula Deen.

When you think of "southern cookin'" or "country cookin'" most likely the first dish you think of will be Chicken and Dumplings. This dish has become an American staple over our short history, and I'm willing to bet most people love some version of this dish (and there's a good chance it's a family's tradition).

This dish, actually this recipe, was one of my first real expeditions into the cooking world. My family history being what it is, I absolutely considered this an important dish to master. I made it according to the recipe, and though it wasn't really what I expected, it was tasty regardless. Over the years I've refined this recipe a touch to suit my purposes, and I'm happy with the result. Though certainly I give props to Paula Deen and her family's recipe, what your receiving today is actually a hybrid Paula/Idiotdadcooks version.

For this recipe you will need:

Chicken Soup:
1 Whole Chicken in 8 pieces (2-3.5 lbs)
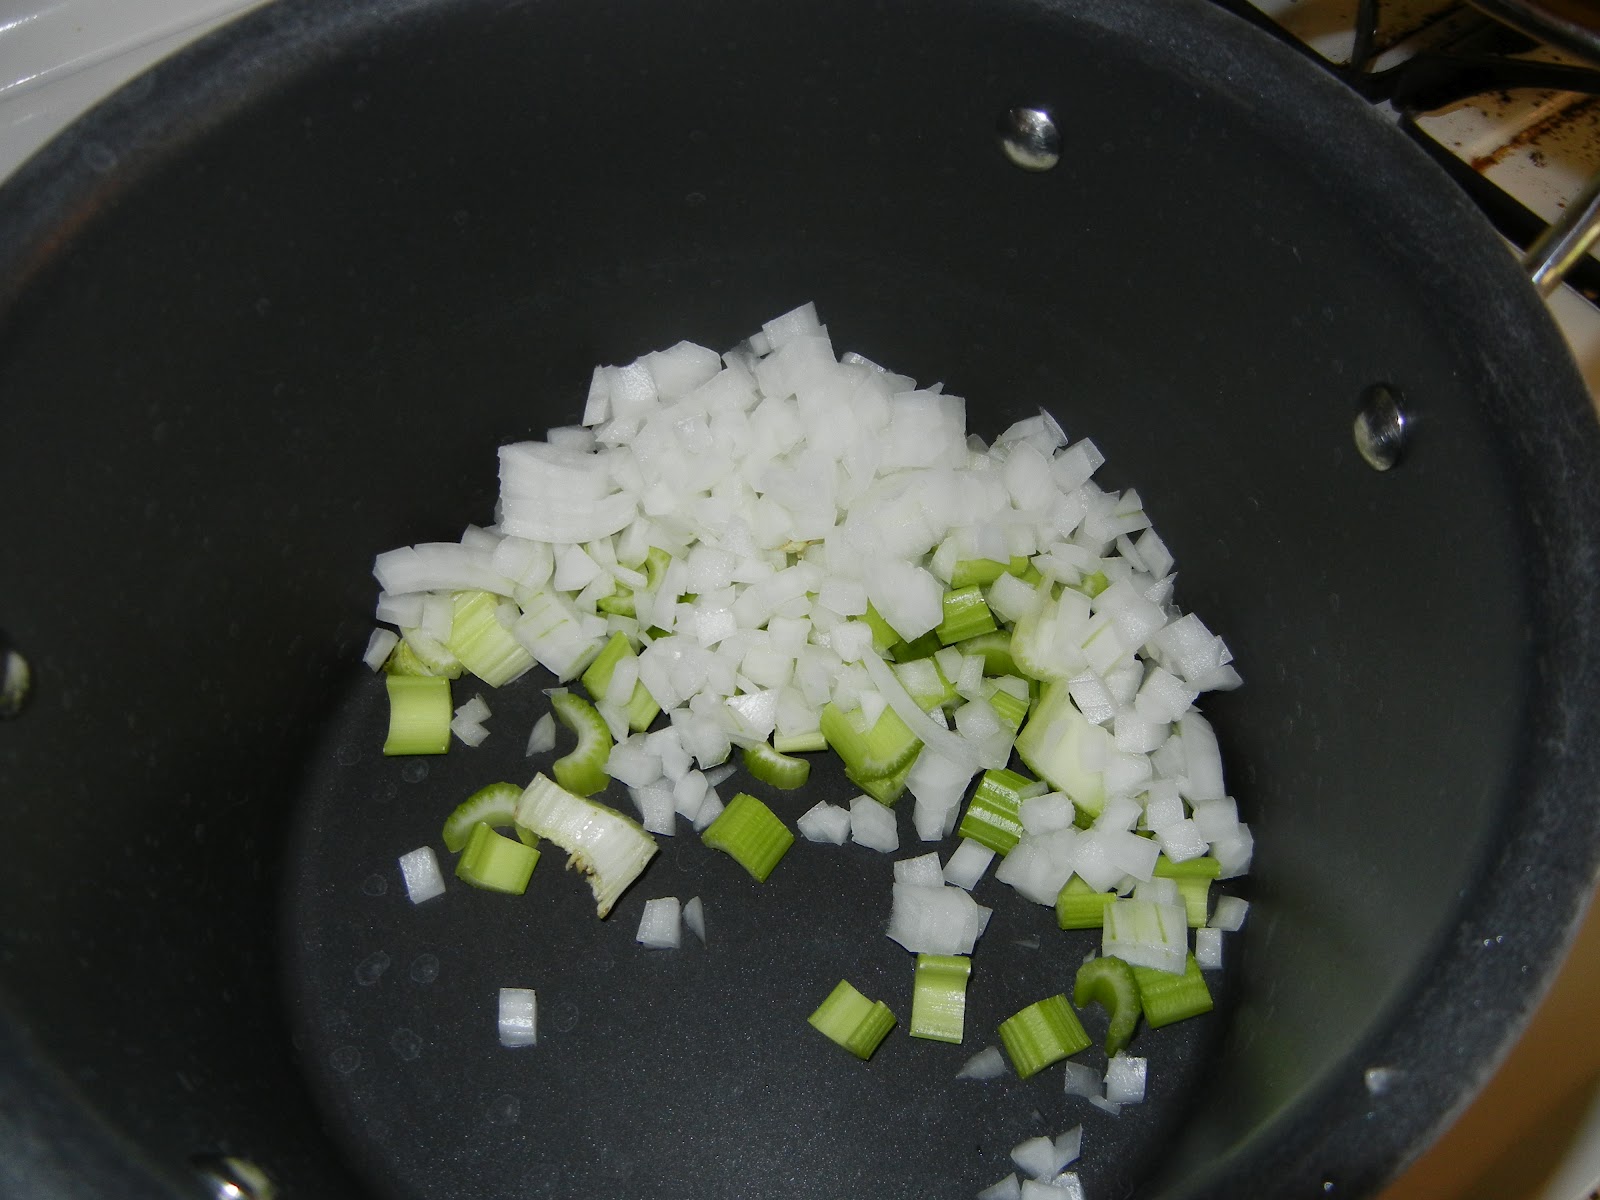
4 ribs celery
1/2 large onion
2 bay leaves
2 chicken bouillon cubes
1 10 3/4 ounce can Cream O' Celery soup
3 quarts water
1 Teaspoon (Red Robin Seasoning)

Dumplings:
2 cups AP flour
1 teaspoon salt
1 cup ice water

Thickener:
2 Teaspoons Cornstarch
1/4 cup cold water

*Note: If you wish to use Paula's original recipe simply follow the link above. The most noticeable differences between what you see there and here, are the following:
1. I only use 1/2 an onion, not a whole.
2. I use 3 not 4 quarts of water, otherwise in my opinion it's too soupy.
3. I use Red Robin's fry seasoning instead of Paula's "House Seasoning" because I don't feel like making house seasoning, and I think the Red Robin's seasoning is more flavorful.

If you aren't a fan of "exact science cooking" you're going to adore this dish. The first step you want take is get all your vegetables cut. Once this is done simply put all the chicken soup ingredients in the pot, flip your stove on high until it comes to a boil. Once it starts to boil turn your heat down to medium, and simmer for 40 minutes.


Make sure you're stirring the soup portion pretty often as it cooks. You don't want anything sinking to the bottom and getting burned. You also don't want any spices or whatnot being stuck on the bottom or flavoring only one piece of chicken.

While your soup portion is cooking, get your dumplings ready. This is easy as heck. Get one cup of water and throw a couple ice cubes in it. Stir your AP flour and salt with a fork in the bowl, and make a little hole in the middle. A couple teaspoons at a time, add the water to the hole while working it in to the flour. By the time you've used all your water all the flour should be used, and make a pretty stiff ball. If you have to, add a touch more water if you can't get it all to act as one stiff dough. Let the dough rest a few minutes, then flour your surface and rolling pin, and roll it out. It should be about 1/8 to 1/4 of an inch thick. Take a pizza cutter, and cut 1" squares (or as close as you can) out of the dough. Let that rest for a while, while you finish your soup.


When your timer goes off to end the simmering of your chicken soup, take out all the chicken pieces, and throw away your bay leaves. Let your chicken cool down for a few minutes before your proceed. Peel off the skin (discard it), and pick all the meat off the chicken and put it back in the soup (discard the bones). Bring your soup back up to a boil. Add your Cream O' Celery soup, also at this time mix up a 1/4 cup of cold water and 2 teaspoons of cornstarch and throw that in too.

Once the soup has been boiling for a few minutes again start to carefully put your dumplings in the pot. Let them boil for 5 minutes, once this is done remove the pot from the heat. Allow this to cool for about 15 to 20 minutes and plate however you wish! I heated up some store bought mashed potatoes and poured the chicken and dumplings over them in the bowl, which was awesome! This will be a crowd pleaser, which is good because it will feed a crowd!


*Note: While cooking this I started to think about experimenting with the dumplings. I didn't have time to do it for this blog entry, if you wish you could put a couple teaspoons of baking powder in your flour via a sifter before you make your dough. That would make the dumplings puff up a touch, for a lighter fluffier dumpling. I may revisit this dish in the future. Until then, Eat Well Everyone!

Friday, April 6, 2012

I Love Bread Pudding


Make sure you go to Idiotdadcooks' Facebook Page and "Like" it! Hints, tips, updates, product reviews, and more will be shared through Facebook! There is a link in the right column! See you there! 

The original recipe for Bread Pudding can be found on a web page called MomsWhoThink.com at http://www.momswhothink.com/easy-recipes/bread-pudding-recipe.html (Which is funny because I'm a Dad and the blog is Idiotdadcooks)

Simply put, I love Bread Pudding. It's a dessert that fits almost any occasion and any entree`. It can be dressed up or dressed down, simple or complex. Really I can't think of a setting that bread pudding would be an inappropriate dessert to serve. In the pantheon of sweets, bread pudding is most definitely in my top 3.

You'll love this recipe because truly it's a budget friendly dessert that packs a sophisticated wallop when it's finished. When I was considering what to make this week I was trying to think of a dessert that would mostly incorporate what I already had in the pantry (again, no budget) and used many ingredients we have used together on this blog. It turned out I already had every ingredient required save two, the french bread and half N half. Six bucks and a trip to the grocery store later I was ready to rock.

I have to say I've had some pretty rave reviews about this bread pudding so far. I myself and a conniseur of sorts concerning bread pudding, and I must admit (even though I made it myself) this is among the best I've had.

For this recipe you'll need:

For the Bread Pudding
2 cups Half N Half (hnh)
1/4 cup butter
2/3 cup brown sugar "packed" (light or dark depends on your tongue)
3 large eggs (size Large eggs are standard size for baking)
2 teaspoons cinnamon
1/4 teaspoon ground nutmeg
1 teaspoon vanilla extract
3 cups of bread (french bread is what I used) torn up in to little pieces
1/2 cup raisins

For the Sauce
1 cup Half N Half
2 tablespoons butter
1/3 cup granulated (regular) sugar
1 teaspoon vanilla extract
1 tablespoon flour
dash of salt

Set your oven to 350 before you do anything else. You want to make sure it's good and ready for this so the pudding will cook properly.

A lot of bread pudding recipe's will require you to let your bread go stale. This makes sense because the invention of bread pudding was a means to figure out how to utilize stale bread. This recipe thankfully does not require that step, and can be made in a pinch.

Start off by taking a 1.5 quart casserole dish and lube it well with butter. Simply cut a stick in half and rub the interior of the dish well until you've evenly coated the inside. After you've done that tear apart your bread until you have 3 cups worth. You're going to want the pieces to be relatively small, though size variation is expected. Place the torn up bread pieces evenly in the dish, and set it aside. Now we need to concentrate on making the custard for our pudding.


To make the custard you're going to want a non stick sauce pan (my preference), and a whisk or large spoon. Poor your half N half in to the sauce pan, and set your heat to medium. Let the half N half come up to a boil, and add your butter, stirring relatively constantly until the butter is melted. Take the half N half/butter combo off the burner and set aside.

*A Side Note: Dairy on heat tends to be somewhat volatile. It will bubble up quick and over flow if not attended. Don't ignore dairy on heat. Thank you.

Next you're going to combine in a "mixer safe" bowl the eggs, cinnamon, nutmeg, vanilla, and brown sugar. Take your hand mixer and mix for about one minute. Make sure you start slowly with a few pulses, you don't want to wear the mixture.

This is where you have to wait for your hnh/butter combo to cool down to a lukewarm state. Realize the eggs will turn in to scrambled eggs if your not careful, so make sure you can completely comfortably touch the hnf/butter mixture before you add it to the bowl.

Once you can comfortably touch your hnh/butter mixture start your hand mixer again. While mixing start to drizzle the hnh/butter mixture to the bowl. Keep doing this until both mixes are completely combined. Once this is done simply pour this mixture over the bread. Add your raisins to the top, and with a large spoon gently mix the bread, custard, and raisins. Make sure all the bread has absorbed a good amount of the custard mixture, and put it in the oven (please make sure your rack is dead center of your oven). Bake for 50 minutes, and prepare to fend off small children, animals, and spouses. The smell will take over the house, and you will love it.

The video this week is a tad long, but will show you the general assembly of the custard and the combining of it with the bread.


While your bread pudding is cooking, go ahead an wash the sauce pan you used for the hnh/butter mix because you'll need it for the icing like glaze we will be making next.

I would hold off on starting this glaze until about 10 minutes before you are due to take the pudding out of the oven. This stuff is fantastic but will set up quickly, and you'll want the liquid factor to be in full play when you pour it over your pudding. Actually, you may even want to wait to start the glaze after you take the pudding out, it depends on how well you multitask.

This glaze is actually pretty easy to make, but does ABSOLUTELY  REQUIRE YOUR ATTENTION THROUGH THE ENTIRE PROCESS! Simply put all the ingredients listed above in the the sauce pan, turn your heat on to medium. (*Note: for those concerned with a loose term like "dash of salt" just shake a normal salt shaker about two times over your glaze, that will suffice) With a whisk simply stir, and keep stirring the entire time it's on the heat. When it starts to boil regardless of your stirring set a timer for 4 minutes. Continue to stir until the timer goes off. Turn off your heat at this point, and let the glaze rest for about 2 minutes. After the rest time, simply take the entire sauce pan over to your bread pudding and evenly distribute the glaze over the entire dish.

*Note: Below there is a picture of a spoon coated in the glaze with a wipe mark on it. To test your glaze to see if it's the right thickness you can dip a spoon's backside (yes a clean one) in to the glaze, and take your finger and wipe a strip off. The glaze should basically stay still, as seen below.


Below you'll see a few pictures of the finished product, in the casserole dish and plated.


This bread pudding is AMAZING. Not too sweet, certainly far from bland, not soupy, yet certainly a bread pudding. This is a wonderful, cheap, simple, yet sophisticated tasting dish. You'll love it, as will anyone you allow to touch this (and yes, you'll be tempted not to share). This certainly is a favorite of mine, and my family as well. Eat well everyone!

P.S.
This is fantastic reheated. Cut off the offending portion you wish to consume, put it on a small plate and microwave on high for 1 minute. The glaze will remelt, and the pudding will now lose much moisture at all.